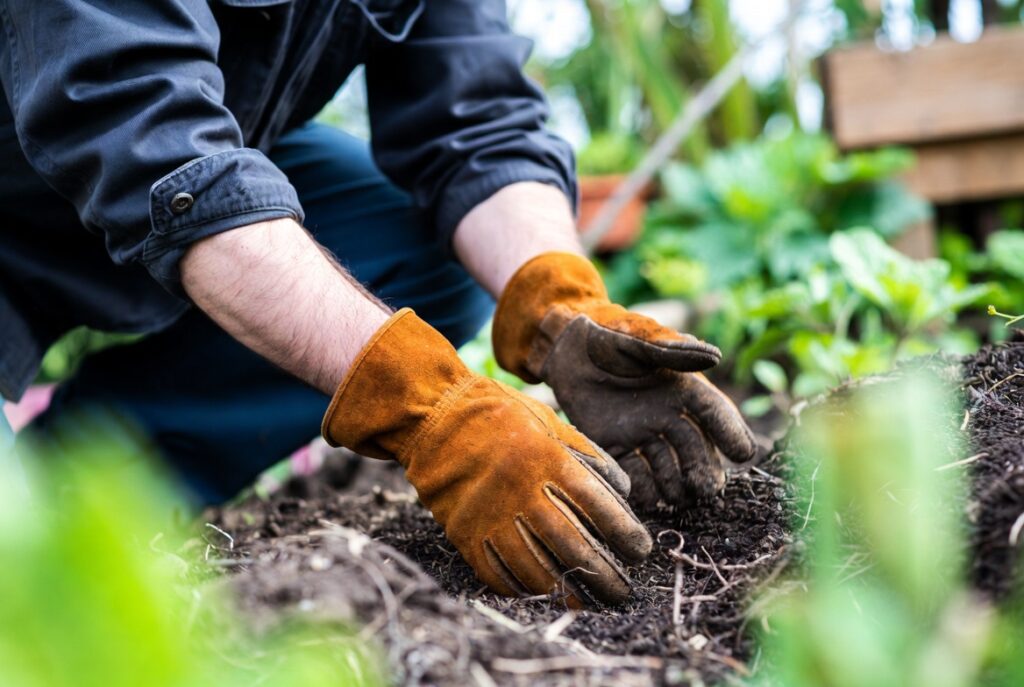
When you step out into your garden for a long day of pruning, digging, and planting, your leather gloves are often the only thing standing between your hands and the harsh elements. You rely on them to protect you from thorns, blisters, and abrasive soil, yet many gardeners overlook the fact that these gloves are made from a natural material that requires its own specialized care. If you have ever noticed your favorite pair of gloves becoming stiff, cracked, or smelling a bit “funky” after a season of heavy use, you are witnessing the effects of environmental degradation on leather fibers. Leather is essentially a biological substrate, and just like your own skin, it can become dehydrated and damaged if it isn’t cleaned and conditioned properly. By taking the time to master the art of washing and maintaining your gear, you aren’t just cleaning a tool; you are preserving a trusted companion that can last for years if you treat it with the right touch.
Understanding the Nature of Your Leather Gloves
Before you start the washing process, you need to understand what kind of leather you are working with. Not all gloves are created equal, and the way you treat a pair of heavy cowhide gloves will differ slightly from how you handle delicate goatskin or suede. Leather is created through the tanning process, which stabilizes the animal hide and prevents it from rotting. In the world of gardening, you will most likely encounter four main types of leather, each with its own “personality” and care requirements.
Cowhide is the “workhorse” of the garden. You probably use these for heavy-duty tasks like moving rocks or clearing brush because they are thick and highly resistant to punctures. However, cowhide is notorious for becoming as stiff as a board if you get it wet and let it dry too quickly. Goatskin, on the other hand, is the “gold standard” for dexterity. You will find that goatskin gloves are much more supple and flexible because the hide contains natural lanolin, which helps the leather stay soft and resist water better than cowhide. Pigskin is unique because it is very breathable. You can tell if you have pigskin gloves by looking for small groups of three follicles on the surface. Interestingly, pigskin is one of the few leathers that actually becomes softer with use and doesn’t get quite as stiff as cowhide after a soak. Finally, you may have suede or “split” leather gloves. These have a fuzzy nap that provides a great grip, but they are very absorbent and can be ruined if you use too much water during the cleaning process.
| Leather Type | Key Characteristics | Best Use Case | Maintenance Difficulty |
|---|---|---|---|
| Cowhide | Thick, very durable, abrasion-resistant | Heavy labor, handling wood, stones | Moderate (tends to stiffen) |
| Goatskin | Supple, naturally water-resistant, high dexterity | Pruning roses, delicate planting | Low (stays soft easily) |
| Pigskin | Porous, very breathable, stays soft when wet | Hot weather, damp conditions | Low (naturally flexible) |
| Suede | Napped finish, high grip, comfortable | General chores, non-thorny tasks | High (requires specialized tools) |
Step 1: Create Cleaning Solution
When your gloves are too dirty for a simple brushing, it is time for a “bubble bath,” but you must be very careful with the soap you choose. You should avoid harsh laundry detergents or dish soaps that are designed to strip away grease, as they will also strip away the vital oils that keep your leather flexible. Instead, you should reach for a mild soap like saddle soap, which is specifically formulated to clean and lightly lubricate leather at the same time. If you don’t have saddle soap, a gentle, pH-balanced hand soap or Castile soap will work in a pinch.
You want to mix a small amount of your chosen soap with lukewarm water in a bowl. Do not use hot water; heat is one of the greatest enemies of leather and can cause it to shrink and become brittle. Your goal is to create a sudsy mixture where the foam does most of the work, rather than the liquid water itself.
Step 2: The Gentle Surface Wash
This is the part of the process where most people make the mistake of soaking their gloves. You must never submerge your leather gloves in a bucket of water. Instead, you should dip a clean microfiber cloth or a soft sponge into your soapy water and wring it out until it is just damp, not dripping. Lay your gloves flat on a clean surface and wipe them down using gentle, circular motions.
If you find a particularly stubborn stain, you can put the glove on your hand. This allows you to better access the seams and provides a firm surface to scrub against without pulling the leather too roughly. Use a soft toothbrush to work the soap suds into the grain in those dirty areas, but be careful not to over-saturate the material. Your objective is to lift the dirt onto the cloth, not to wash it through the leather to the inside.
Step 3: Rinsing Without the Hose
Once you have finished cleaning the exterior, you need to remove the soap residue. If you leave soap on the leather, it can dry into a film that makes the gloves feel stiff and can even irritate your skin the next time you wear them. To “rinse” the gloves, take a fresh cloth dampened with only clean, cool water and wipe down the entire surface again. You want to be thorough, especially around the fingers, but you should still be aiming to keep the leather as dry as possible.
Step 4: Sanitize the Interior
The inside of your gloves is likely just as dirty as the outside, filled with sweat and bacteria from your hands. If the interior smells bad, you can use a mixture of one part white vinegar and one part distilled water. Lightly dampen a cloth with this solution and reach inside the glove to wipe the lining. The vinegar acts as a natural disinfectant and helps to neutralize the alkaline salts from your sweat. For gloves with a fuzzy or shearling lining, this step is particularly important for keeping the fibers from clumping together.
Step 5: The Drying Game—Patience is a Virtue
How you dry your gloves is arguably more important than how you wash them. This is the stage where most gardeners ruin their gear by trying to speed things up. You must never place your leather gloves on a radiator, near a heater, or in direct sunlight. High heat causes the water molecules to evaporate too quickly, which pulls the leather’s natural oils along with it, leaving you with gloves that feel like cardboard.
Instead, you should lay your gloves flat on a clean, absorbent towel in a cool, shaded area with good airflow. To help them keep their form and absorb internal moisture, you can stuff the fingers with crumpled newspaper or dry paper towels. Every hour or so, you should check on them. While they are still slightly damp, put them on your hands and flex your fingers. This stretches the collagen fibers and ensures that the gloves dry in a shape that actually fits your hand, rather than shrinking into a misshapen ball.
Step 6: Conditioning and Restoring Suppleness
Once your gloves are completely dry, they will likely feel a little “thirstier” than usual. Washing removes some of the lipids that keep the leather soft, so you must replace them with a high-quality leather conditioner. You can choose from various products depending on your needs:
- Saddle Soap/Creams: Great for regular maintenance and providing a light protective layer.
- Obenauf’s Leather Oil: This is a heavy-duty option that is excellent for restoring very old, dried-out gloves or for providing maximum waterproofing if you work in wet conditions.
- Mink Oil or Neatsfoot Oil: These are classic choices that penetrate deeply to soften the leather, but be aware that they can significantly darken the color of your gloves.
Apply a small amount of the conditioner to a soft cloth and rub it into the leather in circular motions. Don’t forget the crevices between the fingers and the seams. Let the conditioner sit for a few hours to be fully absorbed, and then buff away any excess with a clean, dry cloth. Your gloves should now feel soft, flexible, and ready for your next session in the garden.
| Conditioner Type | Primary Ingredient | Best For | Potential Downsides |
|---|---|---|---|
| Leather Cream/Balm | Emulsified oils and waxes | Regular maintenance of soft leathers | Requires frequent re-application |
| Boot Oil (Obenauf’s) | Natural oils and beeswax | Heavy-duty protection, old leather | Can darken leather considerably |
| Mink Oil | Animal fats | Waterproofing and extreme softening | Can make leather too soft for thorns |
| Saddle Soap | Mild soap and glycerin | Cleaning and light conditioning | Not a substitute for deep oiling |
Why Regular Cleaning is Essential for Your Safety
You might think that a bit of dirt on your gloves is just a sign of hard work, but leaving that dirt on the leather can actually be dangerous for both the gloves and your hands. When dry soil is left on the surface, its tiny, sharp particles work their way into the pores of the leather. Every time you flex your hand, those particles act like microscopic sandpaper, slowly cutting through the collagen fibers that give the leather its strength. If you use your gloves while they are saturated with old sweat and dirt, you are also creating a breeding ground for bacteria and mold. Sweat contains salts and urea that can strip away the natural oils in the leather, leading to “glove rot”. If you have ever felt an itch or developed a rash after wearing your gardening gloves, it might be because of the buildup of microbes or plant irritants like poison ivy sap that have been trapped in the fibers.
How to Store Your Gloves for Longevity
Where you put your gloves at the end of the day is just as important as how you wash them. You want to store your leather gloves in a cool, dry place with plenty of airflow.
- Avoid Sunlight: Don’t leave them on a sunny windowsill; UV rays will bake the leather and cause it to fade and crack.
- Avoid Humidity: Damp sheds or unventilated boxes are recipes for mold. If your gloves are even slightly damp from sweat, hang them up rather than tossing them in a drawer.
- Maintain Shape: Instead of crumpling them into a ball, try to lay them flat or hang them by the fingers. This prevents permanent creases that can eventually turn into tears in the leather.
Conclusion
Your leather gardening gloves are more than just an accessory; they are a vital piece of protective equipment that keeps you safe while you pursue your passion. By following this step-by-step process—from the initial dry brushing to the final conditioning—you are ensuring that your gloves remain a durable, comfortable, and reliable tool for years to come. Remember that leather is a natural material that responds to the environment just like we do. It needs to breathe, it needs to stay hydrated, and it needs to be protected from extreme heat and light.
Taking ten minutes at the end of a long day to shake off the dirt and check your gloves might seem like a chore, but it is the secret to getting a “human touch” out of your gear. The more you care for your gloves, the more they will mold to the shape of your hands, eventually becoming so comfortable that you’ll forget you’re even wearing them. So, the next time you finish a big project in the garden, don’t just toss your gloves on the shelf. Give them the care they deserve, and they will continue to protect your hands for many seasons to come.
Frequently Asked Questions (FAQs)
Absolutely not. You should never put leather in the dryer. The high heat and tumbling action will cause the leather to shrink dramatically, crack, and lose its shape. It is the fastest way to turn a high-quality pair of gloves into trash. Always air-dry your gloves naturally in a shaded, well-ventilated area.
Not necessarily. This often happens if the leather was too wet and dried too quickly, or if it was very dirty and the minerals crystallized between the fibers. You can usually save them by applying a liberal amount of leather conditioner or oil. Work the oil into the leather with your fingers and gently massage and flex the gloves to break up the stiffness. It may take a few applications, but most leather can be brought back to life.
For most gardeners, a full wash is only necessary once or twice a season, or whenever they become visibly heavily soiled. However, you should do light surface cleaning and conditioning every month if you use them frequently. Over-washing leather can strip away the natural tannins and oils, so it is better to do frequent light maintenance than occasional aggressive cleaning.
Goatskin is usually much thinner, softer, and has a very smooth grain. Cowhide is thicker, feels “grainier” or rougher to the touch, and is much stiffer when new. If you look closely at goatskin, you will see a very fine, pebble-like texture, whereas cowhide has a more irregular and pronounced grain pattern.