Are you ready to give your seeds the best possible start without relying on messy soil? Making your own soil-less seed starting mix is easier than you think—and it can make a huge difference in how your seedlings grow.
With the right blend of lightweight, well-draining ingredients, you’ll create a perfect environment that helps seeds sprout quickly and stay healthy. Imagine saving money, controlling what goes into your mix, and watching your garden thrive from the very first sprout.
Keep reading to discover simple steps and expert tips that will help you craft your own soil-less seed starting mix at home—your plants will thank you!

Credit: theseedsage.com
Ingredients Needed
Creating your own soil-less seed starting mix requires a few simple ingredients. These components work together to provide a light, airy, and well-draining environment for seeds to sprout. Each ingredient plays a unique role in seedling growth.
Gathering the right materials ensures your seedlings develop strong roots and healthy shoots. Choose ingredients that retain moisture but avoid waterlogging. Here are the key ingredients you will need.
Peat Moss Or Coco Coir
Peat moss is a popular base for seed starting mixes. It holds moisture well and provides a soft texture. Coco coir is a sustainable alternative made from coconut husks. It also retains water and improves aeration. Both materials are lightweight and help seeds stay moist without becoming soggy.
Perlite And Vermiculite
Perlite is a white, volcanic material that adds air space to the mix. It improves drainage and prevents soil compaction. Vermiculite is a mineral that holds water and nutrients. It helps seeds absorb moisture evenly. Use perlite and vermiculite together to balance drainage and moisture retention.
Optional Additives
You can add extra ingredients to boost seed growth. A small amount of compost or worm castings adds nutrients. Some gardeners include a pinch of lime to balance acidity. Avoid heavy fertilizers at this stage. Optional additives support healthy seedlings but keep the mix light and loose.
Choosing Materials
Choosing the right materials is key to making a successful soil-less seed starting mix. The mix needs to be light, well-draining, and able to hold enough moisture. Each component plays a specific role in creating the perfect environment for seeds to sprout and grow. Understanding the options helps you create a mix that fits your plants’ needs and your budget.
Sourcing Organic Components
Organic components add natural nutrients and improve moisture retention. Common choices include coconut coir and peat moss. Coconut coir is a renewable resource made from coconut husks. Peat moss comes from decomposed sphagnum moss found in bogs. Both are lightweight and help keep the mix loose. You can find these materials at garden centers or online. Choose organic components that are free from chemicals or additives. This ensures a safe start for your seeds.
Comparing Peat Moss And Coco Coir
Peat moss holds water well but can be acidic. It may need lime to balance pH for some plants. Peat is natural but not very sustainable due to slow regeneration. Coco coir is more eco-friendly and has a neutral pH. It retains moisture without becoming soggy. Coir also has good air circulation for roots. Choose peat moss if you want strong moisture retention. Pick coco coir for a sustainable and pH-neutral option.
Selecting Perlite Vs Vermiculite
Perlite is a volcanic glass that expands when heated. It improves drainage and aeration in the mix. Perlite keeps the mix light and prevents compaction. Vermiculite is a mineral that also expands with heat. It holds more water than perlite and adds some nutrients. Vermiculite is better for moisture-loving seeds. Perlite suits plants needing fast drainage. Many gardeners use a blend of both for balanced moisture and air.
Mixing The Components
Mixing the components of your soil-less seed starting mix is a crucial step. The right balance creates a light, airy medium that supports seed growth. Proper mixing ensures good water retention and drainage. It also provides enough air for roots to breathe. Follow simple steps to measure and combine ingredients correctly.
Measuring Proportions
Use equal parts of your main ingredients for best results. For example, one part peat moss or coco coir, one part perlite, and one part vermiculite. Measure each component with a clean container or cup. Accurate proportions help maintain the right texture and moisture levels. Avoid guessing amounts to keep the mix consistent.
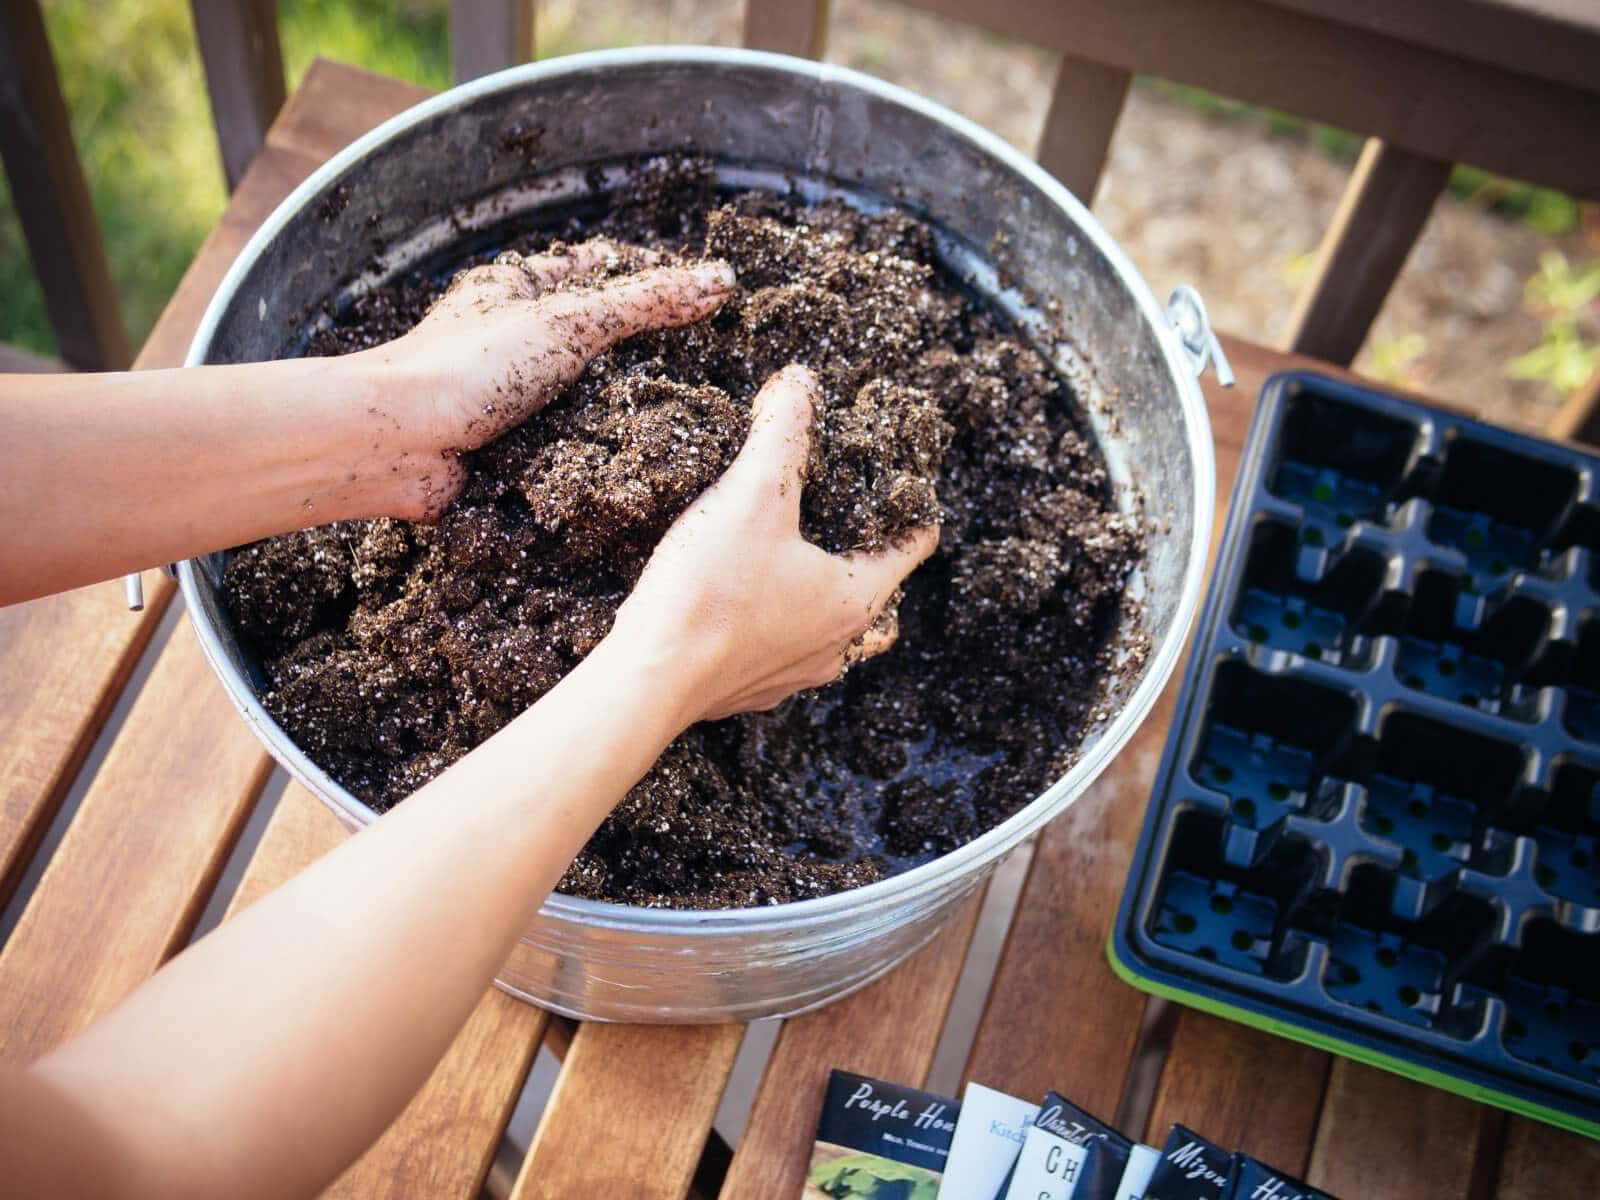
Combining Ingredients Thoroughly
Mix all ingredients in a large container or bucket. Use your hands, a trowel, or a garden shovel to blend well. Stir until the mix looks uniform and no clumps remain. Thorough mixing ensures even distribution of moisture and air pockets. This step improves seed germination and root development.
Adjusting Ph Levels
Adjusting the pH level of your soil-less seed starting mix is crucial for healthy seed germination. Seeds need a balanced pH to absorb nutrients properly. A pH that is too high or too low can stunt growth or prevent seeds from sprouting.
Regularly checking and adjusting the pH ensures your mix supports strong seedlings. This step is simple but important for a successful start.
Testing Soil Acidity
Begin by testing the acidity of your seed starting mix. Use a pH test kit or a digital pH meter for accuracy. Mix a small amount of your soil-less mix with distilled water in a clean container. Stir well and let it settle.
Dip the test strip or probe into the water. Compare the color or digital reading to the provided chart. Most seeds prefer a pH between 5.5 and 6.5, which is slightly acidic to neutral. Record your results for reference.
Balancing With Lime Or Sulfur
If the pH is too low (acidic), add garden lime to raise it. Use dolomitic lime, which also adds magnesium. Sprinkle lime evenly and mix thoroughly into the seed starting mix.
If the pH is too high (alkaline), add elemental sulfur to lower it. Use small amounts, as sulfur works slowly. Mix it well and test again after a few days. Repeat adjustments until the pH falls in the desired range.
Proper pH balance helps your seeds absorb nutrients and grow strong roots. Adjusting pH is a simple but vital step in making your own soil-less seed starting mix.
Adding Nutrients
Nutrients play a key role in helping seeds grow strong roots and healthy leaves. Soil-less mixes lack natural nutrients, so adding them is essential. Nutrients provide energy and support early plant development.
Choosing the right nutrient sources can improve germination and seedling vigor. Use natural, gentle options to avoid harming tender roots. Below are two popular ways to enrich your soil-less seed starting mix.
Incorporating Worm Castings
Worm castings are rich in nutrients and beneficial microbes. They improve soil structure and help plants absorb nutrients. Add a small amount, about 10-15% of your mix volume.
This addition boosts nitrogen, phosphorus, and potassium levels naturally. Worm castings also enhance moisture retention in the mix. They create a healthy environment for seedling roots to thrive.
Using Organic Fertilizers
Organic fertilizers offer slow-release nutrients that feed seedlings gently. Choose formulas made from bone meal, fish emulsion, or seaweed extract. Mix them in small amounts to avoid burning young roots.
These fertilizers supply essential minerals like calcium, magnesium, and trace elements. They support steady growth and strong plant structure. Use sparingly and follow product instructions for best results.

Credit: thegardeningcook.com
Storing The Mix
Storing your soil-less seed starting mix correctly keeps it fresh and ready for planting. Proper storage prevents contamination and moisture loss. This helps seeds sprout in a healthy environment. Follow simple steps to maintain your mix’s quality over time.
Choosing Containers
Select containers that seal tightly to keep air out. Use plastic bins or glass jars with lids. Clear containers let you see the mix inside. Avoid containers that allow moisture or pests to enter. Label each container with the date and contents. This helps track freshness and use old mix first.
Maintaining Moisture And Freshness
Keep the mix slightly moist but not wet. Dry mix loses its ability to support seeds well. Check moisture regularly by touching the mix. Spray water gently if it feels dry. Store containers in a cool, dry place away from sunlight. Sunlight can dry the mix and harm nutrients. Proper moisture and storage extend the mix’s life and effectiveness.
Using The Mix
Using your homemade soil-less seed starting mix correctly helps young plants grow strong. This mix provides good air and moisture balance. Proper use ensures seeds get the best start possible. Below are key steps for using the mix in seedling trays and watering for germination.
Filling Seedling Trays
Fill trays gently with the soil-less mix. Avoid packing it too tightly. Leave a small gap at the top for watering. Smooth the surface but keep it loose. This helps roots grow easily and air to circulate well. Make sure trays have drainage holes to avoid water buildup. Using clean trays prevents disease problems. Fill each cell or container with the mix evenly.
Watering Tips For Germination
Water the mix gently to keep it moist but not soaked. Use a spray bottle or fine watering can for best results. Too much water can cause seeds to rot. Too little water stops seeds from sprouting. Check moisture daily, especially in warm places. Keep the mix evenly damp until seedlings appear. After germination, water a little less to encourage strong roots.
Common Mistakes To Avoid
Making your own soil-less seed starting mix can be simple and rewarding. Avoiding common mistakes saves time and helps seedlings grow strong. Mistakes can harm seed germination and growth. Keep your mix light and well-draining. Pay attention to moisture and texture. These tips improve your seed starting success.
Overwatering Issues
Overwatering is a frequent problem with seed starting mixes. Too much water drowns seeds and roots. It causes mold and root rot. Water just enough to keep the mix moist, not soaked. Check moisture daily. Spray water gently instead of pouring. Good drainage prevents water buildup. Use containers with holes to let excess water escape.
Compacting The Mix
Compacting the seed starting mix reduces air flow. Roots need oxygen to grow well. Pressing the mix too hard blocks air pockets. Keep the mix loose and fluffy. Lightly fill containers without packing down. Fluffy mix holds water and air evenly. This helps seeds sprout faster and roots spread easily.
Credit: gardenbetty.com
Frequently Asked Questions
How To Make Soilless Seed Starting Mix?
Mix equal parts of coco coir, perlite, and vermiculite. Add a handful of worm castings for nutrients. Blend thoroughly and use immediately.
How To Make Soil Less Potting Mix?
Mix equal parts peat moss or coco coir, perlite, and vermiculite thoroughly. Add nutrients like worm castings if desired. Store in a dry container.
How To Make Your Own Soilless Potting Mix?
Mix equal parts of peat moss or coco coir, perlite, and vermiculite. Stir thoroughly. Add nutrients if needed. Store in a dry container.
What Is The Mix For Soilless Germination?
Mix equal parts of coco coir, perlite, and vermiculite for soilless germination. Add worm castings optionally. Combine thoroughly and moisten before seeding.
What Ingredients Are Needed For Soil-less Seed Starting Mix?
You need sphagnum peat moss or coco coir, perlite, and vermiculite. These ingredients provide good drainage and air circulation for seeds.
Conclusion
Creating your own soil-less seed starting mix helps control plant growth conditions. Use simple ingredients like coco coir, perlite, and vermiculite for best results. This mix retains moisture while allowing good airflow to roots. It supports strong seedling development without soil-borne diseases.
Store the mix in a dry, cool place until ready to use. Starting seeds with this mix can improve germination rates and plant health. Give it a try and watch your seedlings thrive from the very beginning. Gardening becomes easier and more rewarding with the right seed starting mix.