You have heard the rumors that hydroponics—the revolutionary technique of growing plants without soil—is an expensive hobby reserved for industrial farms or dedicated enthusiasts with massive budgets. This is a common misconception, often perpetuated by the price tag of pre-made starter kits. But you do not need complex pumps, fancy meters, or automated systems to start your soil-free journey. You can absolutely build a highly effective system for under $30, and you can achieve stunning results right in your kitchen or on your patio.
The key to achieving this minimal budget is selecting the right method. We are going to harness the power of the Kratky Method, a passive hydroponic technique developed by Dr. Bernard Kratky. This method is the single greatest budget hack available because it requires zero electricity. By eliminating the need for an air pump, air stone, water pump, or timers, you instantly cut out half the cost and complexity associated with traditional Deep Water Culture (DWC) systems. This trade-off—sacrificing automation for simplicity—allows you to keep both the initial build cost and the long-term operating costs incredibly low.
Right Components for Hydroponic System
To make a functional hydroponic system for less than $30 requires you to be ruthlessly efficient with your material choices and embrace the DIY spirit. Every component we select is chosen because it either performs a dual function or can be sourced cheaply.
Kratky vs. DWC: Why We Skip the Pump
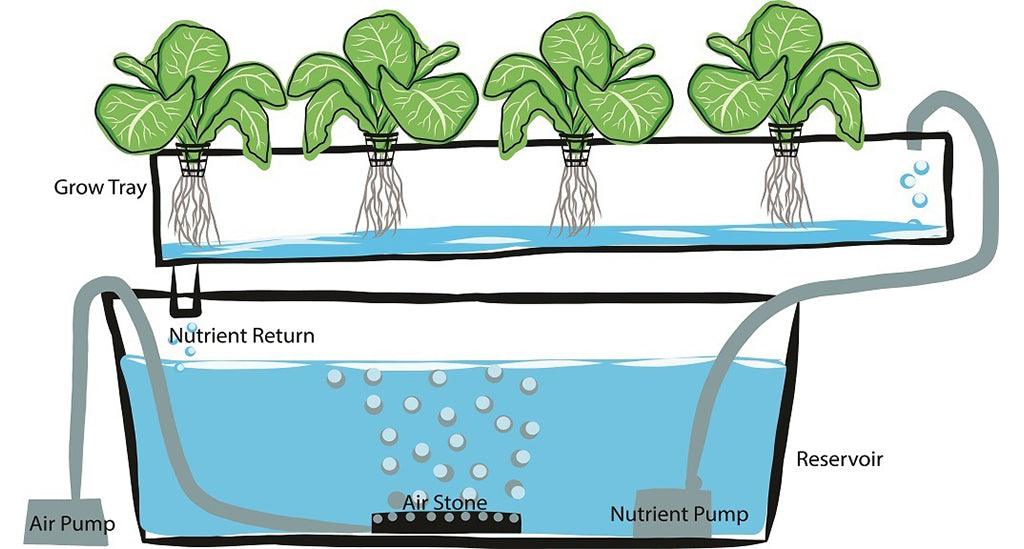
To understand why the Kratky system is so much cheaper, you must first understand its physics. Most hydroponic methods, like Deep Water Culture (DWC), require the plant’s entire root mass to be submerged in water. For the roots to breathe, the water must be actively oxygenated using an air pump and an air stone, otherwise, the roots will quickly suffocate and die.
The Kratky method cleverly bypasses this requirement. It is designed to work passively by exploiting the plant’s own consumption habits. When you first set up the system, the nutrient solution merely touches the bottom of the root base. As your plant drinks the water, the water level gradually drops, naturally creating a critical air gap between the remaining nutrient solution and the bucket lid. The roots that remain submerged absorb water and nutrients, while the roots suspended in the air gap above the water develop into “air roots,” which absorb necessary oxygen. This passive oxygenation is why you do not need to buy or run an electric pump, saving you not only the initial hardware cost but also recurring electricity expenses, confirming Kratky as the most sustainable and cheapest entry point.
Required Materials:
The simplicity of the Kratky method means your material list is short and inexpensive:
- The Reservoir: A 5-gallon bucket is the standard choice for this system. The most critical factor is that the bucket must be opaque or darkened. If light reaches the nutrient solution, you will rapidly face major issues like algae overgrowth.
- The Root Anchor: You will need net cups, ideally 3-inch ones, which are designed to suspend the plant and allow roots to grow out. However, if you are truly dedicated to minimizing cost, you can use cheap plastic cups and drill several holes in the bottom and sides. This DIY net cup works perfectly well for Kratky because the roots will find their way out and into the nutrient solution regardless of the cup material.
- The Starter Medium: Small starter cubes, such as Rockwool (also called Stonewool), are the standard inert medium used for germinating seeds and supporting your seedling until the roots are established.
The $30 Shopping List
Achieving the $30 goal requires smart purchasing, particularly around the single largest fixed cost: the nutrient solution. The cost allocation strategy dictates that we must prioritize consumables (nutrients) that will last for months over expensive, non-essential hardware (like pumps or digital meters).
Here is how you can budget your build, utilizing local sourcing and smart substitutions to ensure you hit the target:
| Component | Description/Specifications | Estimated Cost | Frugal Tip/Source |
|---|---|---|---|
| Reservoir | Single 5-gallon food-grade bucket (opaque or dark) | $5.00 | Often available locally at hardware stores or ask food establishments for used, cleaned containers. |
| Light Block | Black spray paint or heavy-duty duct tape/aluminum foil | $3.00 | Essential protection against algae growth and nutrient theft. |
| Net Cups (3″) | 2-4 cups or DIY plastic cups | $3.00 | Use homemade plastic cups with drilled holes to save this cost entirely. |
| Growing Medium | Small pack of Rockwool starter cubes (e.g., 1-inch starter plugs) | $5.00 | Small packs are readily available starting around $4.99–$7.69. |
| Nutrients | Small MasterBlend Combo Kit (dry mix) | $14.00 | This cost is an investment, providing solution for many months/grows. |
| Total Build Cost | $30.00 | The budget is met by maximizing DIY hardware solutions. |
Building Your Single-Bucket System
Your DIY build is straightforward, involving four critical steps that focus on preparation and nutrient management.
Step 1: Preparing the Reservoir and Preventing Algae
The single most important preparation step is ensuring zero light penetration into the nutrient solution. Algae, which thrive on light and steal nutrients from your plant, are the enemy of a simple, passive system.
If your 5-gallon bucket is not inherently opaque (dark blue or black), you must make it so. The cheapest and most effective method is to apply black spray paint to the outside of the bucket (avoid painting the interior, which might release chemicals). Alternatively, you can heavily wrap the bucket and lid with black duct tape or aluminum foil. You must check every seam and corner, ensuring that not even a sliver of light can reach the water.
A potential complication arises from this cost-saving step: black surfaces absorb heat. If you place your newly black bucket in direct sunlight, the nutrient solution temperature will quickly rise. Water temperatures above 75°F drastically increase the risk of deadly root rot, which kills plants by reducing dissolved oxygen levels. Therefore, if you use black paint, you must plan to keep your system in a cool environment, ideally where the solution temperature stays between 65°F and 75°F. This crucial correlation between your cheap light-blocking method and the necessary climate control must be managed to maintain plant health.
Step 2: Cutting the Holes for the Net Cups
Secure the lid onto your 5-gallon bucket. If you are using 3-inch net pots, you will need to use a 3-inch hole saw attached to a drill to cut matching holes in the lid. If you do not own a hole saw, you can carefully use a utility knife to cut a slightly smaller hole than your net cup diameter. The hole should be sized so that the lip of the net cup or your DIY plastic cup rests securely on the lid, suspending the cup slightly above the floor of the bucket.
Step 3: Seed Starting and Transplanting
Start your chosen seeds (such as leafy greens) in pre-soaked Rockwool cubes. The cubes should be fully saturated and slightly damp but not dripping wet. Once your seedling has developed a few true leaves and you see small, healthy roots emerging from the bottom of the Rockwool cube, it is time to transplant.
Place the Rockwool cube into the net pot (or your DIY cup). To anchor the plant securely, fill the rest of the net cup around the Rockwool with an inert growing medium. While Hydroton (clay pebbles) or perlite are ideal, if you are saving every dollar, you can tightly secure the rockwool cube in your DIY cup, ensuring the plant is upright and stable.
Step 4: Mixing Your Nutrient Solution
Hydroponic nutrients are highly concentrated, so always follow the manufacturer’s directions exactly when preparing your solution. Dry mixes like MasterBlend typically require you to mix the three separate components (fertilizer, calcium nitrate, and Epsom salt) in a specific order with fresh water to ensure they dissolve properly and avoid precipitation.
Once mixed, fill your 5-gallon bucket with roughly 4 to 4.5 gallons of prepared solution. You will install the lid with the planted net cups, ensuring the bottom of the net cup (and the emerging roots) just touches the surface of the nutrient solution.
Operating Your Passive Kratky System
The operational success of your passive Kratky system relies entirely on understanding and respecting the physics of the non-circulating water.
The Non-Negotiable Air Gap
The core principle of the Kratky method is the mandatory air gap. When you first fill the bucket, the solution should just touch the bottom of the net cup, allowing the seedling roots to wick the water and begin growing downwards.
As the plant matures and drinks, the water level will drop. This drop is intentional and necessary because the roots that grew while submerged must convert into “air roots” to breathe oxygen.
The Deadly Refill Mistake
A critical mistake beginners make is seeing the water level drop and panicking, leading them to refill the reservoir entirely to the top, submerging the newly formed air roots. If you submerge these air roots, you are effectively running a DWC system without an air pump. The newly submerged roots will quickly suffocate from lack of dissolved oxygen, leading directly to root rot, which will kill your plant.
For your single-bucket Kratky system, you should only add small amounts of fresh water or solution to maintain the overall volume, or, for fast-growing crops like lettuce, you should wait until the reservoir is nearly empty before replacing the entire solution. Do not top off the reservoir completely to the original starting line, or you will drown your plant’s air supply.
Nutrient Strength and Solution Refresh
Seedlings and very young plants require a very weak nutrient solution to avoid burning their delicate roots. As the plant enters its vegetative growth phase, you must increase the nutrient strength, following the mixing instructions provided with your MasterBlend kit for the appropriate stage.
Over time, your plants will not absorb nutrients evenly; they will preferentially drink water and absorb certain minerals faster than others, causing the solution’s balance to shift. Simply topping off with water for long periods will lead to nutrient imbalances. For optimal health and maximum yield, you should completely refresh the nutrient solution every 3 to 4 weeks, discarding the old water and mixing a fresh batch.
pH on a Shoestring Budget
Expertise in hydroponics is often determined by the ability to manage water chemistry. As established, pH control is not optional; it is the gatekeeper to nutrient absorption.
Why pH is the Silent Killer
The pH level measures the acidity or alkalinity of your nutrient solution. The scale runs from 0 (highly acidic) to 14 (highly alkaline), with 7 being neutral. In hydroponics, unlike soil gardening where the soil acts as a natural buffer, the solution’s pH determines the availability of minerals to your plant roots. If the pH drifts too high (alkaline) or too low (acidic), your plants can suffer from nutrient lockout, where essential elements are chemically unavailable, leading to deficiency symptoms like yellowing leaves or stunted growth, even though the nutrients are physically present in the water.
Your goal is the slightly acidic Goldilocks Zone of 5.5 to 6.5.
Budget Testing Methods: Accuracy vs. Price
To ensure the trustworthiness of your grow, you need accurate testing. While highly accurate digital pH meters exist, they are too expensive for the sub-$30 build.
- Avoid pH Strips: While cheap and quick, testing strips often test the entire 0 to 14 spectrum, sacrificing the precision needed for the critical hydroponic range of 5.5 to 6.5. In an industry where decimal points matter, strips are simply not accurate enough for professional-level results.
- Recommended Budget Tool: The liquid drop test kit (e.g., General Hydroponics pH Test Kit) offers superior accuracy for the hydroponic spectrum (4.0 to 8.5) and is highly cost-effective per test. This liquid kit should be your first recommended accessory purchase, ensuring success.
DIY pH Adjustment: Using Household Items (With Extreme Caution)
If you find your pH is too high (above 6.5), you need a pH Down solution. White vinegar (acetic acid) is a safe and widely available household item that can be used sparingly to lower the pH.
If your pH is too low (below 5.5), you need a pH Up solution. While some common DIY sources might suggest using baking soda (sodium bicarbonate), you must strongly avoid this ingredient for long-term hydroponic pH adjustment. The sodium contained in baking soda can actively interfere with your plant’s ability to uptake potassium, a vital macro-nutrient, potentially damaging your plants and destroying your harvest. Professional growers prioritize plant health and mineral balance over minor cost savings; therefore, if you need pH Up, use a commercially formulated product designed specifically for hydroponics, or allow the pH to naturally drift upwards before a full solution change.
Conclusion
You have successfully constructed a fully operational, passive Kratky hydroponics system for under $30, proving that soil-free gardening is both accessible and extremely budget-friendly. This single-bucket build is the ultimate proof of concept, demonstrating that the biggest initial investment required for successful growing is not money, but rather time, attention to detail, and patience.
By using the cost-saving power of the passive Kratky method, substituting expensive hardware with repurposed DIY components, and strategically investing in cost-effective bulk nutrients, you have gained the ability to grow high-yield, leafy greens right at home. The knowledge you now possess—particularly around maintaining the crucial air gap, blocking light, and controlling pH—allows you to sidestep the most common pitfalls of beginner hydroponics.
Once you have mastered your single 5-gallon bucket, scaling up is simple and involves replicating this model. Many growers successfully expand their capacity by connecting multiple tubs or buckets and growing them under cheap supplemental lighting. With this foundational knowledge, you are ready to expand your sustainable garden and enjoy fresh, soil-free produce year-round.