Are you ready to take control of your indoor gardening and grow healthy plants right at home? Building your own grow tent is the perfect way to create a customized, controlled space that boosts your plants’ growth while saving you money.
Imagine having a neat, light-proof environment tailored to your needs—without spending a fortune on expensive setups. In this guide, you’ll discover simple, step-by-step instructions to make a sturdy grow tent using easy-to-find materials. Whether you’re a beginner or looking to improve your current setup, you’ll learn how to build a space that keeps light, temperature, and humidity just right for your plants to thrive.
Keep reading, and soon you’ll have your own grow tent ready to grow the garden you’ve always wanted!
Materials You Needed to Make a Grow Tent
A grow tent requires specific materials to build a functional and efficient space. Each component plays a vital role in maintaining plant health and growth. Gathering the right materials ensures your tent is sturdy, light-proof, and well-ventilated. This section details the essential items needed to make your own grow tent.
Frame Components
The frame forms the tent’s structure. Common materials include PVC pipes or metal rods. PVC is lightweight and easy to cut. Metal rods offer more strength and durability. Use connectors or corner joints to assemble the frame securely. Make sure the frame size fits your available space and plant needs.
Reflective Coverings
Reflective coverings improve light efficiency inside the tent. Mylar sheets are popular for their high reflectivity. Panda film, which is black on one side and white on the other, controls light and prevents leaks. Emergency blankets can also work as a budget option. Secure the coverings tightly to avoid gaps where light could escape.
Ventilation Equipment
Proper airflow is critical for healthy plants. Include a small exhaust fan to remove hot air. Intake vents or passive openings let fresh air enter. Carbon filters help reduce odors and purify the air. Flexible ducting connects fans and filters. Choose fans with adjustable speed for better climate control.
Lighting Options
Lighting simulates sunlight for photosynthesis. LED grow lights are energy-efficient and produce less heat. Fluorescent lights work well for seedlings and clones. High-intensity discharge (HID) lights provide strong light for mature plants but need more ventilation. Pick lights that match your plant type and tent size.
Tools And Accessories
Basic tools include a tape measure, scissors, and a utility knife. Use strong duct tape or foil tape to seal seams and secure coverings. Zip ties help organize cables and hold components in place. A thermometer and hygrometer monitor temperature and humidity. Power strips and timers automate lighting and fan schedules.
Process of Building The Frame
Building the frame is the first important step in making a grow tent. The frame holds everything together. It must be strong and stable to support the covering and plants. Using simple materials like PVC pipes makes the process affordable and easy. This section shows how to assemble the frame correctly.
Assemble Pvc Pipes
Start by cutting PVC pipes to the needed lengths. These pipes will form the sides, top, and bottom of the frame. Use PVC connectors to join the pipes at corners and joints. Push the pipes firmly into the connectors. Make sure all parts fit tightly to avoid wobbling. A simple rectangular shape works best for most grow tents.
Add Structural Support
Add extra pipes in the middle sections for better support. This prevents the frame from bending under weight. You can also add crossbars between the vertical pipes. These bars increase the frame’s strength. Use T-shaped or elbow connectors to attach these support pipes securely. Strong support keeps the tent steady and safe.
Ensure Frame Stability
Check all joints and connections for tightness. Loose connections cause the frame to shake or fall. Use zip ties or clamps to hold pipes together if needed. Place the frame on a flat, level surface for balance. If the floor is uneven, add small blocks under the frame legs. Stability is key for a successful grow tent setup.
Things to Consider for Covering The Tent
Covering the tent properly is key for a successful grow tent. It protects plants from outside light and keeps the environment stable. The right covering reflects light back onto plants, boosting growth. It also blocks any unwanted light leaks that could harm your plants. This section explains how to choose the best materials, secure them well, and seal any gaps.
Choose Reflective Materials
Selecting the right material helps maximize light inside the tent. Mylar sheets are very reflective and common for grow tents. Panda film, which is black on one side and white on the other, also works well. Emergency blankets can serve as a budget option with decent reflectivity. Pick a material that is durable and easy to clean. Reflective surfaces increase light efficiency, helping your plants grow faster.
Secure The Covering
Attach the covering tightly to the frame to avoid sagging. Use strong duct tape or foil tape for a secure hold. Stretch the material evenly to prevent wrinkles that reduce reflection. Make sure corners and edges are firmly taped down. A well-secured cover keeps the tent stable and light-proof. Check regularly to ensure the covering stays tight as plants grow.
Seal Light Leaks
Light leaks can stress plants and reduce yields. Inspect all seams and corners for small gaps. Use reflective tape to cover any holes or tears immediately. Overlap material edges when taping to block all light. Seal around door flaps and ventilation openings carefully. A fully sealed tent maintains a consistent light cycle, which is crucial for healthy plant growth.
Way of Creating Access Points
Creating access points in your grow tent is vital for easy entry and maintenance. These openings allow you to check plants, adjust equipment, and manage the environment without hassle. Proper access points also help maintain the tent’s light-proof and sealed environment.
Plan where to place the door flaps to fit your workspace and tent size. The access points should be large enough for comfortable movement but not so big that they let light escape or reduce airflow control.
Cutting Door Flaps
Mark the door flap area on the tent covering using a pencil or chalk. Use a ruler to ensure straight lines for a clean cut. Carefully cut the marked section with scissors or a utility knife. Leave a small margin around the cut edges to attach fasteners later. Avoid cutting too close to the frame to keep the tent sturdy.
Installing Velcro Or Zippers
Attach Velcro strips along the edges of the cut door flap and the tent. Use strong adhesive or sew the Velcro for better durability. Velcro allows quick opening and closing of the door flap. Alternatively, install zippers by sewing them along the flap edges. Zippers create a tighter seal and prevent light leaks. Choose fasteners that fit your skill level and tools available.
Installing Process for Ventilation
Proper ventilation is key to a successful grow tent. It controls temperature, humidity, and air quality. Good airflow prevents mold and pests, helping plants stay healthy.
Installing ventilation involves making fan openings, mounting fans, and optimizing airflow. Each step ensures fresh air circulates efficiently inside the tent.
Cutting Fan Openings
Measure where fans will go before cutting. Mark spots for exhaust and intake openings. Use a sharp utility knife or scissors to cut holes carefully. Make holes slightly smaller than fan size for a snug fit. Seal edges with tape to avoid air leaks. Properly cut openings help maintain controlled airflow and prevent light leaks.
Mounting Exhaust And Intake Fans
Attach exhaust fan near the top of the tent. Hot air rises, so this placement removes warm air effectively. Install intake fan or passive vent near the bottom. This lets fresh air enter and cool the space. Use brackets or straps to secure fans firmly. Connect fans to power sources safely. Well-mounted fans improve air exchange and keep the environment stable.
Optimizing Airflow
Arrange fans to create a smooth air path through the tent. Avoid obstacles that block airflow. Position fans to pull air across plants for even temperature. Use ducting to direct air outside and reduce noise. Add a carbon filter to the exhaust fan to control odors. Adjust fan speed for balance between ventilation and energy use. Optimized airflow promotes strong plant growth and reduces risks of heat stress.
Setting Up Lighting
Setting up lighting is a key step in building a grow tent. Good lighting helps plants grow strong and healthy. The right lights provide energy just like the sun. Proper setup also keeps the tent safe and efficient. Focus on choosing the right lights, hanging them well, and managing electricity carefully.
Selecting Grow Lights
Choose lights that match your plants’ needs. LED grow lights save energy and run cool. They last longer and give full spectrum light. HID lights are strong but use more power. Fluorescent bulbs work for seedlings and small plants. Check the light’s intensity and coverage area. Match the light size to your tent size for best results.
Hanging Lights Securely
Use strong hooks or ratchet hangers to hold lights. Make sure the lights do not touch the tent walls. Keep them at the right height to avoid burning plants. Adjust the height as plants grow taller. Secure cables neatly to prevent tripping or pulling. Proper hanging also helps spread light evenly across your plants.
Managing Electrical Safety
Use a power strip with surge protection for all lights. Avoid overloading outlets by checking the total wattage. Keep all electrical parts away from water or humidity. Use waterproof connectors if possible. Turn off lights before making any adjustments. Regularly inspect cables and plugs for damage or wear. Good safety habits protect you and your plants.
Testing And Adjustments
Testing and adjustments are vital after building your grow tent. This step ensures your tent works well for healthy plant growth. Check every part carefully to find issues early. Small fixes can improve your tent’s performance and save your plants.
Checking For Light Leaks
Light leaks can harm your plants by disturbing their light cycles. Turn off all lights outside the tent and turn on the grow lights inside. Look for any light escaping through seams or holes. Use black tape to cover spots that let light through. Repeat this check often during use.
Monitoring Temperature And Humidity
Plants need the right temperature and humidity to grow strong. Place a thermometer and hygrometer inside the tent. Check these readings several times a day at different spots. Make sure temperature stays within the ideal range for your plants. Keep humidity levels stable to avoid mold or dryness.
Making Necessary Modifications
Adjust ventilation if temperature or humidity is off. Add fans or vents to improve airflow. Use humidifiers or dehumidifiers to control moisture. Strengthen weak frame parts or fix sagging covers. Recheck light seals after changes. Keep testing and adjusting until conditions stay steady and plants thrive.

Credit: www.gorillagrowtent.com
Alternative Diy Ideas
Alternative DIY ideas offer creative ways to build a grow tent without buying a ready-made kit. These options use common household items or materials easy to find. They can save money and allow customization to fit your space. Explore different approaches to find one that suits your needs and skills.
Using Metal Shelving Units
Metal shelving units provide a strong frame for a grow tent. Their open design allows easy access and good airflow. Cover the shelves with reflective material like Mylar or white plastic sheets. Secure the covering with clips or tape to prevent light leaks. Add LED grow lights and small fans for ventilation. This setup is flexible and can be adjusted as plants grow.
Converting Showers Or Cabinets
Old showers or large cabinets can become effective grow tents. Their enclosed shape blocks outside light and helps control temperature. Remove any doors or shelves that block airflow. Line the interior with reflective material to boost light inside. Install grow lights at the top and add vents for fresh air. This method uses existing furniture and creates a neat, compact grow space.
Tips For Success
Success in building a grow tent depends on several key factors. Paying attention to light, ventilation, and structure ensures your plants thrive. Small improvements in each area boost growth and health. Follow these tips to create an effective grow tent setup.
Maximizing Light Efficiency
Choose reflective materials like Mylar or Panda film for the walls. They bounce light back to plants, reducing waste. Use LED grow lights as they emit less heat and save energy. Position lights close to plants but avoid burning leaves. Cover all frame joints to block light leaks. A well-lit tent helps plants grow faster and stronger.
Improving Ventilation
Good airflow controls temperature and humidity inside the tent. Install an exhaust fan near the top to remove hot air. Add an intake vent at the bottom for fresh air entry. Use a small fan to circulate air evenly around plants. Avoid stagnant air to prevent mold and pests. Proper ventilation creates a healthy environment for growth.
Ensuring Frame Durability
Build the frame using sturdy materials like PVC pipes or metal rods. Secure all joints tightly with connectors or strong tape. Make sure the frame can hold the weight of lights and fans without bending. Reinforce corners for extra strength and stability. A durable frame keeps the tent safe and lasts longer under daily use.
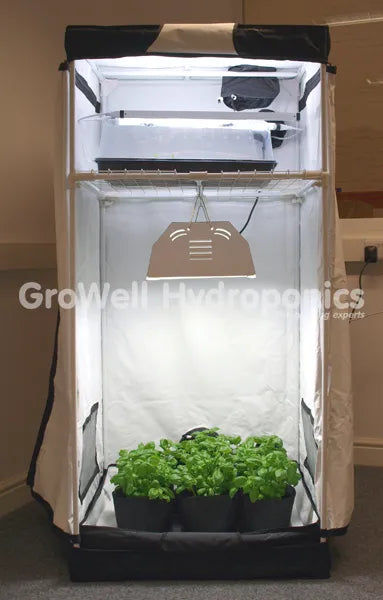
Credit: www.growell.co.uk
Frequently Asked Questions
What Is A Cheap Alternative To A Grow Tent?
A cheap alternative to a grow tent is a DIY setup using PVC pipes and reflective Mylar or emergency blankets. Wrap a metal shelving unit with reflective material for quick assembly. Ensure proper ventilation and lighting to create a controlled environment for indoor plants.
Is A 2×2 Or 2×4 Grow Tent Better?
A 2×4 grow tent offers more space for plants and equipment than a 2×2, enhancing yield potential. Choose 2×2 for limited space or small grows. Select based on your space, plant count, and growth goals.
How Much Electricity Does It Cost To Run A Grow Tent?
Running a grow tent typically costs $15 to $150 monthly, depending on light type and tent size. LED lights use less electricity than HPS. Efficient setups reduce power use and save money.
Will A Bucket Of Water Humidify A Grow Tent?
A bucket of water can slightly increase humidity in a grow tent through natural evaporation. It works best in small tents or as a temporary solution. For consistent humidity control, use a dedicated humidifier designed for grow tents.
Conclusion
Building a grow tent at home is simple and affordable. Use sturdy materials and follow clear steps. Proper ventilation and lighting help plants grow healthy. Seal all edges to keep light inside. Regularly check your setup for best results. This DIY project suits beginners and saves money.
Enjoy growing plants in your own controlled space.