Is your garden hose leaking or broken right when you need it most? Don’t toss it out just yet.
You can save your hose and keep your garden thriving with a simple repair. Imagine turning that frustrating drip or split into a quick fix that saves you money and time. Whether it’s a small pinhole or a section that’s seen better days, you’ll learn exactly how to cut out the damaged part and splice your hose back together like new.
Ready to stop wasting water and get your hose working perfectly again? Keep reading—this guide will show you easy, step-by-step ways to repair your garden hose and get back to watering without hassle.
Tools And Materials
Repairing a broken garden hose requires the right tools and materials. Having these ready makes the job easier and faster. It ensures a strong, leak-free fix that lasts.
This section covers the basic items needed. They help you cut, seal, and join hose parts properly. Knowing what to use avoids guesswork and wasted effort.
Essential Repair Kits
Repair kits are made for fixing garden hoses. They include connectors, seals, and clamps. These parts replace damaged sections and stop leaks.
Kits come in various sizes to fit different hose diameters. They save time by providing all needed parts in one pack. Using a kit ensures a neat and secure repair.
Tape Options
Tape can temporarily fix small leaks or cracks. Special hose repair tape works best. It sticks tightly and resists water pressure.
Electrical tape or duct tape may help briefly but wear out fast. Choose tape made for outdoor use. Wrap it tightly around the damaged area for a good seal.
Cutting Tools
Clean cuts make repairs easier and stronger. Sharp scissors or a utility knife work well. Avoid jagged or crushed edges that cause leaks.
Cut the hose straight at the damage limits. Smooth any rough edges with sandpaper. Proper cutting helps repair parts fit perfectly and hold tight.
Locating The Damage
Finding the exact spot of damage is the first step to fix a broken garden hose. Water leaks or holes can waste water and reduce pressure. Taking time to locate the damage helps to repair the hose correctly. This section explains how to find leaks and assess the damage.
Identifying Leaks And Holes
Start by turning on the water supply to the hose. Slowly check along the hose for any wet spots or water spraying out. Listen for hissing sounds that show where water escapes. Use your hand to feel for moisture or bubbles on the hose surface. These signs point to leaks or holes that need repair.
Assessing Damage Severity
After finding a leak, look closely at the size and type of damage. Small punctures or pinholes are easier to fix with tape or patch kits. Large cuts or cracks may require cutting out the damaged section. Heavy damage near the connectors might mean replacing the hose end. Knowing the severity guides the repair method and materials needed.
Fixing Small Leaks
Small leaks in a garden hose can waste water and reduce pressure. Fixing these leaks quickly keeps your hose working well. Simple tools and materials can stop leaks without replacing the whole hose. The key is to seal the hole tightly to prevent water from escaping. Below are easy ways to fix small leaks using tape.
Using Repair Tape
Repair tape is made for fixing garden hoses. It is strong, waterproof, and sticks well to rubber. Clean the hose surface around the leak before applying. Wrap the tape tightly around the hole. Overlap the tape layers to create a strong seal. Press the tape down firmly to remove air bubbles. Let it sit for a few minutes before using the hose again. This method works well for pinhole leaks and small cracks.
Temporary Tape Solutions
Temporary fixes use common tapes like electrical or duct tape. These tapes can stop leaks for a short time. Wrap the tape tightly around the leak several times. Make sure the hose is dry before wrapping. Temporary tape fixes may not hold under high water pressure. Use this solution only until a permanent repair can be done. Avoid stretching the tape too much to keep it from peeling off.
Credit: edengarden.com
Repairing Mid-hose Breaks
Repairing mid-hose breaks is a common task for garden hose maintenance. The damage often occurs in the middle, making it impossible to just replace the end fittings. Fixing these breaks can save money and extend the hose’s life. It involves cutting out the damaged section and reconnecting the hose securely. Several methods exist, each with its own tools and ease of use.
Cutting Out Damaged Section
First, find the broken or cracked part. Use sharp scissors or a utility knife. Cut straight through the hose on both sides of the damage. Remove the damaged piece completely. Make sure the cuts are clean and even. This step prepares the hose for a proper repair. Clean the cut edges to remove dirt or debris. This helps create a strong connection in the next steps.
Using Barbed Couplings
Barbed couplings are popular for mid-hose repairs. Slide a coupling into one cut end. Push the hose all the way onto the barbs. Repeat with the other hose end. The barbs grip the hose inside tightly. Secure each end with hose clamps for a leak-proof seal. Tighten the clamps with a screwdriver. This method is durable and works with most hose types. It restores the hose’s strength and flow.
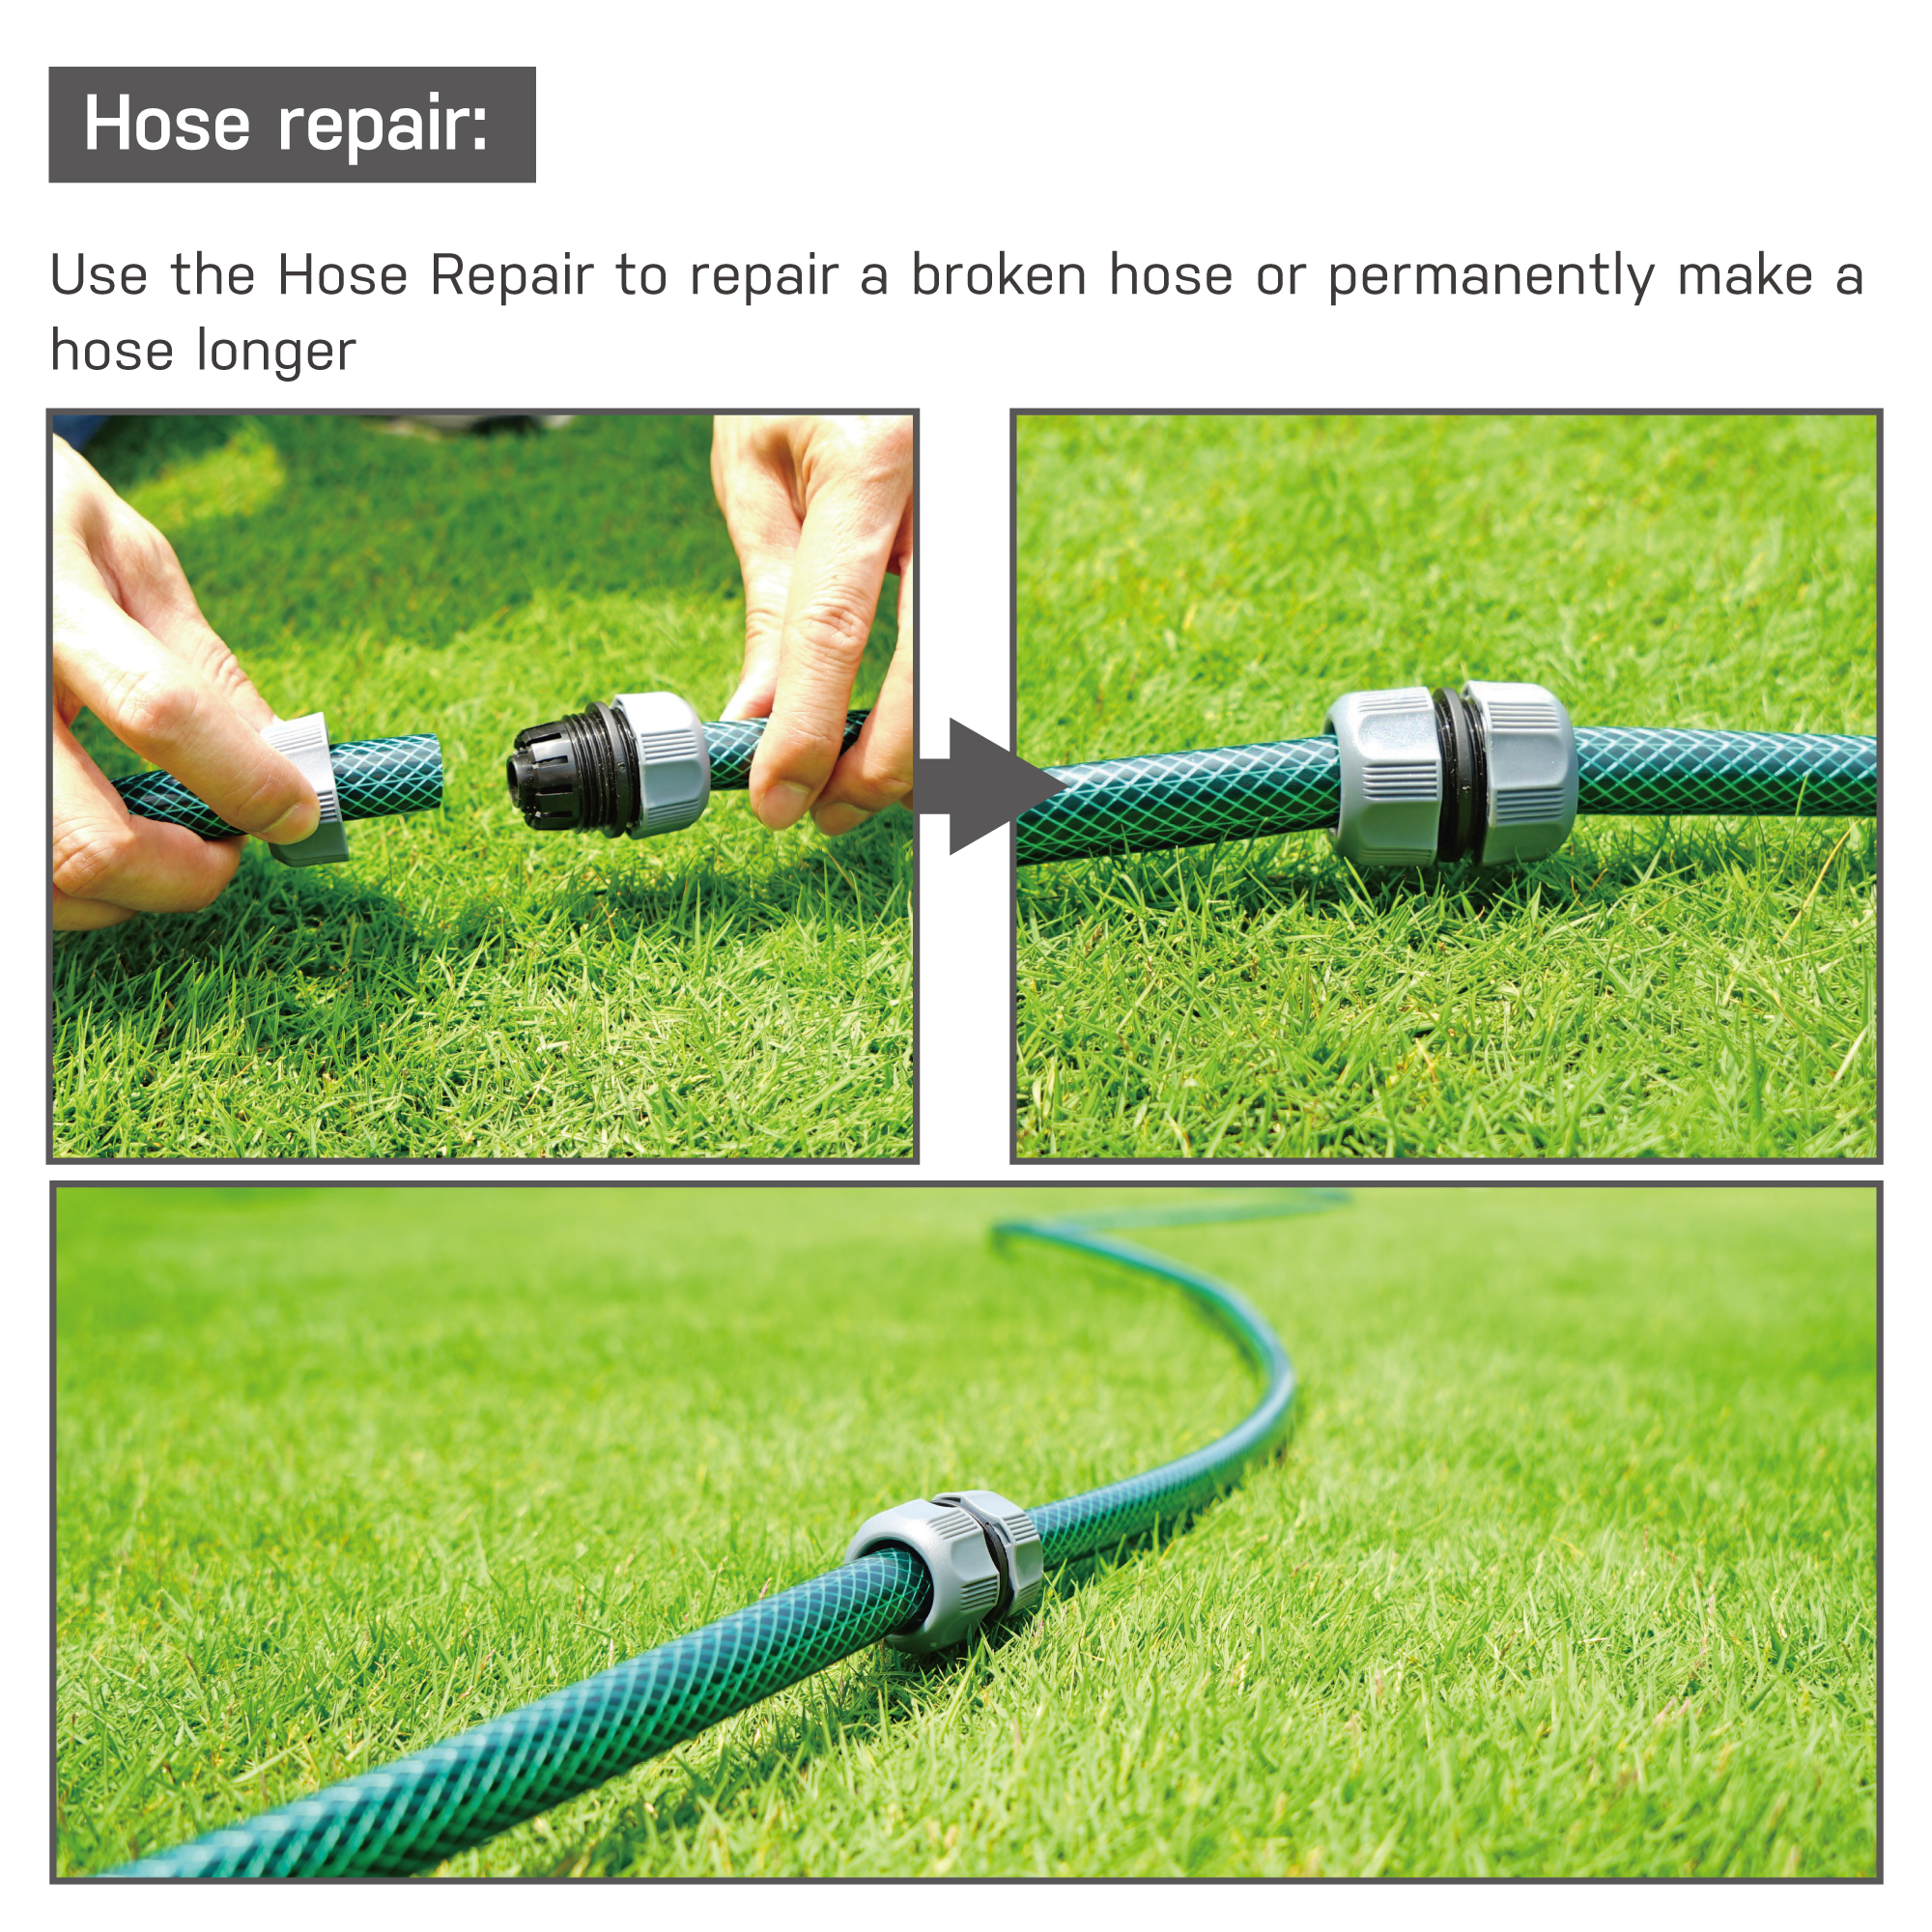
Compression Menders
Compression menders are easy to use and require no clamps. Insert each hose end into the mender. Twist the compression nuts to tighten. The nuts squeeze the hose ends firmly. This creates a watertight seal quickly. Compression menders fit most garden hoses. They provide a neat repair with minimal tools. This option suits quick fixes or small breaks.
Diy Pipe Splice
A DIY pipe splice uses simple materials for a hose repair. Cut the damaged section as usual. Use a short piece of plastic tubing or a PVC pipe slightly smaller than the hose. Insert the tubing inside both hose ends. Push the hose ends onto the tubing to connect. Wrap the splice with waterproof tape for extra security. This homemade solution works in a pinch. It requires patience and careful wrapping to avoid leaks.
Replacing Damaged Ends
Replacing damaged ends is a simple way to fix a broken garden hose. The ends often wear out from regular use. Changing them restores your hose’s function and stops leaks. Follow these easy steps to remove old parts and attach new fittings securely.
Removing Old Coupling
Start by cutting off the damaged hose end cleanly. Use a sharp knife or garden scissors. Remove the old coupling by twisting it off or cutting around it. Be careful not to damage the hose itself. Clear any debris inside the hose before adding new parts.
Attaching New Fittings
Slide the new fitting onto the hose end. Push it in firmly for a tight fit. Make sure the fitting matches your hose size. Some fittings have barbs that grip inside the hose. Twist slightly to ensure it is fully seated and secure.
Securing With Clamps
Place a hose clamp over the fitting and hose junction. Tighten the clamp with a screwdriver until snug. The clamp holds the fitting firmly in place. Check for leaks by running water through the hose. Tighten further if water escapes around the end.

Credit: www.youtube.com
Testing Repairs
After fixing your garden hose, testing the repairs is essential. This step ensures your hose works properly and no leaks remain. Testing helps avoid wasting water and keeps your garden healthy. Follow these simple checks to confirm your hose is in good shape.
Slow Water Pressure Check
Turn on the water slowly and watch the flow. Check for any drop in pressure compared to before. Slow pressure may mean a blockage or poor repair. Inspect the repaired area carefully for any signs of water weakness. Make sure water flows smoothly through the hose.
Tightening Clamps
Clamps hold the hose ends and connectors firmly. After repair, ensure all clamps are tight but not over-tightened. Loose clamps cause leaks and reduce water flow. Use a screwdriver to gently tighten each clamp until secure. Check clamps again after using the hose for some time.
Ensuring Leak-free Use
Run the water at full pressure and watch for leaks. Look closely at the repaired sections and connections. No water should drip or spray out. If leaks appear, tighten clamps or reapply repair materials. A leak-free hose saves water and keeps your garden safe from damage.
Maintenance Tips
Maintaining your garden hose properly helps prevent breaks and leaks. Simple care extends its life and saves money. Follow these tips to keep your hose in good shape.
Proper Storage
Store your garden hose in a cool, dry place. Avoid leaving it under direct sunlight. Sun causes the hose material to weaken and crack.
Drain all the water before storing it. Water left inside can freeze and damage the hose. Coil the hose loosely to avoid kinks and bends.
Use a hose reel or hanger to keep it off the ground. This prevents dirt buildup and reduces wear from dragging.
Avoiding Future Damage
Do not drag the hose over sharp edges or rough surfaces. This action causes abrasions and holes. Lift the hose when moving it around the garden.
Check for leaks regularly and repair small holes immediately. Small problems become bigger if ignored. Avoid stepping on or running over the hose with lawnmowers or vehicles.
Turn off water pressure after each use to reduce stress on the hose. High pressure causes premature wear and bursts.
:max_bytes(150000):strip_icc()/UndergroundWaterLine-Broken-717c87cffc3c4903988fe0dfaca72809.jpg)
Credit: www.thespruce.com
Frequently Asked Questions
Can You Fix A Broken Garden Hose?
Yes, you can fix a broken garden hose by cutting out the damaged section and splicing it with a repair coupling. Use clamps or compression fittings for a secure seal. Avoid temporary fixes like duct tape for long-lasting results. Repair kits work well for quick, durable repairs.
Will Flex Seal Tape Work On A Garden Hose?
Flex Seal tape can temporarily stop garden hose leaks. For lasting repair, cut out damage and use a hose repair kit.
What Can I Use To Patch A Rubber Hose?
Use hose repair tape or electrical tape for small leaks. For larger damage, cut out the damaged section and join ends with a hose repair kit coupling. Clamp tightly to ensure a secure, leak-free seal. Avoid duct tape as a long-term fix.
Can You Patch A Garden Hose With Duct Tape?
Duct tape offers only a temporary fix for garden hose leaks. It often fails to seal tightly and can cause swelling. For a durable repair, cut out the damaged section and use a hose repair kit with couplers and clamps instead.
Conclusion
Fixing a broken garden hose saves money and extends its life. Cut out the damaged part carefully and use a repair kit. These kits are easy to find and simple to use. Make sure the connections are tight to avoid leaks.
A quick repair keeps your garden watering smoothly. Don’t throw away your hose just because of one leak. Small repairs can make a big difference. Keep your garden hose working well with regular checks. This way, watering your plants stays easy and efficient.