Are you dreaming of a charming entrance to your garden that adds both beauty and function? Building your own garden arbor is easier than you think, and it can transform your outdoor space into a peaceful retreat or a stunning focal point.
Whether you want a place for climbing roses to twine or a graceful archway to define your garden path, making a garden arbor lets you personalize your yard while enjoying a rewarding DIY project. In this guide, you’ll discover simple, step-by-step instructions using common materials and tools to create a durable and attractive arbor that suits your style.
Ready to add that wow factor to your garden? Let’s get started!

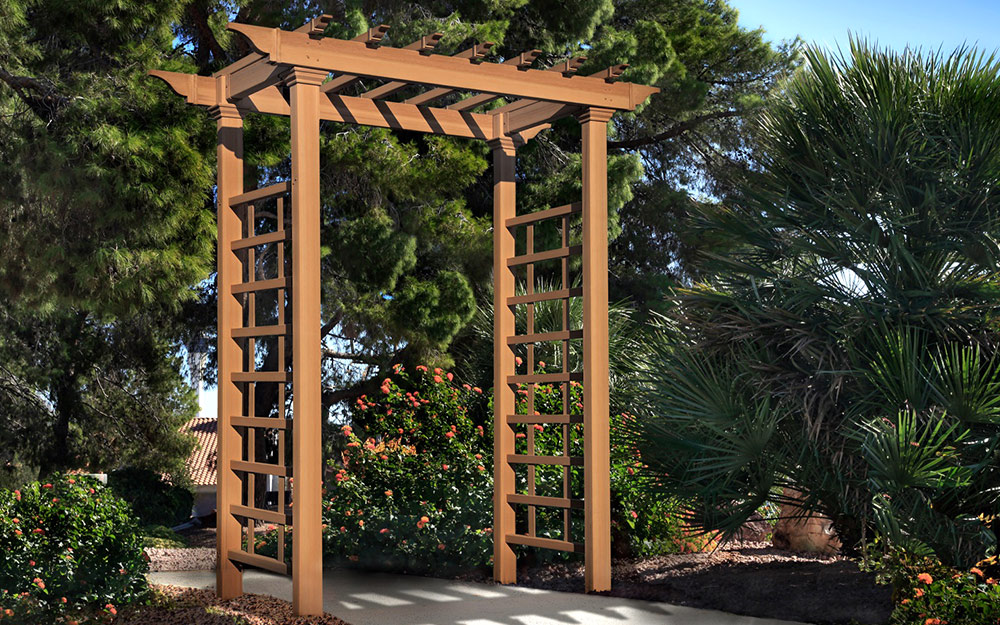
Credit: www.woodsmithplans.com
Materials And Tools
Gathering the right materials and tools lays the foundation for building a strong garden arbor. Choosing quality supplies ensures the structure lasts through all seasons. Understanding what you need helps the project flow smoothly from start to finish.
Choosing Lumber
Select lumber that resists weather and decay. Cedar is a popular choice because it naturally withstands moisture and insects. Pressure-treated wood offers a budget-friendly option that stays strong outdoors. Avoid softwoods that warp or rot quickly. Pick straight, knot-free boards for easy cutting and assembly.
Essential Hardware
Use galvanized or stainless steel screws to prevent rust. Corner brackets add extra strength to joints. Wood glue improves hold between pieces. Anchor bolts or post spikes secure the arbor firmly in the ground. Have a good supply of nails, washers, and bolts for all connections.
Finishing Supplies
Protect your arbor with outdoor paint or stain. Choose products that resist UV rays and water damage. A clear sealant adds an extra layer of defense. Sandpaper smooths rough edges before finishing. Brushes or rollers apply paint evenly for a clean look.
Planning Your Arbor
Planning your garden arbor is the first step to a successful build. Good planning helps you avoid mistakes and saves time. It also ensures the arbor fits well in your garden space. Think about how you want the arbor to look and function before you start building. Consider the size, style, and location carefully. This makes the project easier and more enjoyable.
Selecting Size And Style
Choose a size that fits your garden space. Measure the area where the arbor will go. Make sure it leaves enough room to walk and plant around. Pick a style that matches your garden’s theme. Simple designs suit modern gardens. Curved or ornate styles fit classic or cottage gardens. Keep the style consistent with other garden features.
Site Preparation
Clear the ground where you will build the arbor. Remove grass, weeds, and rocks. Level the soil so the posts stand straight. Mark the exact spot for each post hole. Use stakes and string to outline the shape. Good site preparation helps the arbor stay strong and stable.
Design Customization
Add personal touches to make your arbor unique. Choose wood types that match your garden’s look. Paint or stain the wood for protection and color. Include features like lattice panels or shelves. Think about climbing plants you want to grow on it. Plan for hooks or lighting to enhance the space. Customizing your design makes the arbor special and inviting.
Building Side Frames
Building the side frames is a crucial step in making a garden arbor. These frames form the main support for the structure. Careful cutting and assembling ensure a strong and lasting frame. Follow each step to create side frames that hold your arbor firmly and look great.
Cutting And Assembling Posts
Start by measuring the wood posts for the side frames. Cut four posts to the desired height of your arbor. Use a saw that cuts straight for clean edges. Sand the cut edges to avoid splinters.
Next, lay two posts parallel on a flat surface. Attach horizontal pieces between them using screws or nails. These pieces act as supports and keep the posts steady. Repeat for the other side frame. Make sure both frames are equal in size.
Adding Crossbeams
Crossbeams connect the two side frames at the top. Measure the distance between the frames and cut beams accordingly. Place the beams on top of the side frames.
Secure the crossbeams with screws or brackets. These beams add strength and shape to the arbor. They also create a nice area to hang plants or decorations. Check that the beams are level and firmly attached.
Ensuring Stability
Stability is key to a safe garden arbor. Use braces diagonally between the posts and crossbeams. These braces prevent wobbling and movement. Tighten all screws and check for loose parts.
Consider anchoring the side frames into the ground. Use concrete or metal stakes for extra hold. Test the frame by gently shaking it. A stable frame will not move or sway.
Constructing The Top Frame
The top frame of your garden arbor shapes its overall look and strength. This part holds the rafters and supports climbing plants. Building it carefully ensures stability and style.
Measuring And Cutting Rafters
Start by measuring the length needed for each rafter. Use a tape measure for accuracy. Mark the wood with a pencil before cutting. Cut rafters evenly to maintain balance. Use a saw for clean, straight cuts. Smooth rough edges with sandpaper.
Attaching Rafters To Frames
Place rafters evenly across the top frame. Secure them with screws or nails. Drill pilot holes to prevent wood splitting. Check alignment with a level. Tighten fasteners to keep rafters firm. Make sure all rafters are flush with the frame edges.
Incorporating Decorative Elements
Add charm with decorative trims or cutouts on rafters. Use wood shapes like curves or circles for interest. Attach small lattice pieces between rafters for detail. Paint or stain decorations to match the arbor. These details make your arbor unique and inviting.
Installing The Arbor
Installing the arbor is a key step in building a beautiful garden feature. Proper installation ensures the structure stays strong and stable. Careful work now saves trouble later. Follow these steps to install your garden arbor with confidence.
Digging Post Holes
Start by marking where the posts will go. Use a tape measure to space them evenly. Dig holes at least 24 inches deep for good support. The width should be about three times the post size. Remove all loose dirt and rocks from the holes.
Positioning And Leveling
Place each post into its hole. Check that the post is vertical using a level. Adjust the post until it is perfectly straight. Brace the post with temporary supports. This keeps it steady while you set it in place.
Setting With Concrete
Mix concrete according to package instructions. Pour the concrete into each hole around the post. Fill the hole completely and pack the concrete tightly. Slope the concrete away from the post for drainage. Allow the concrete to cure for at least 24 hours before continuing.
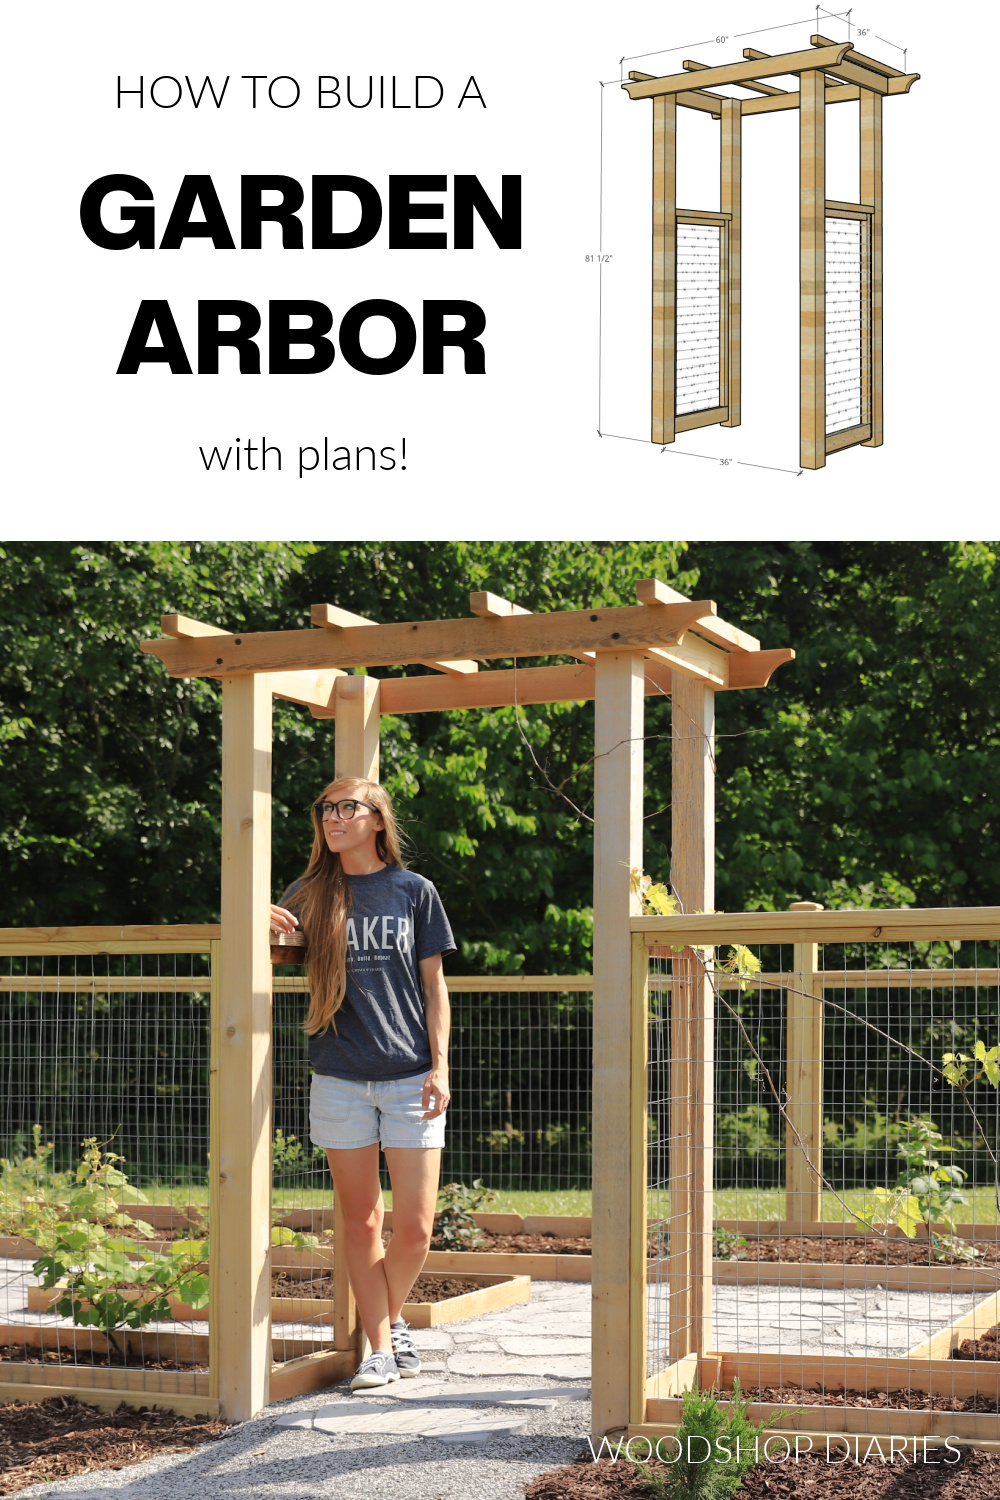
Credit: www.woodshopdiaries.com
Adding Lattice And Supports
Adding lattice and supports transforms a simple garden arbor into a charming focal point. These elements provide structure and enhance the beauty of climbing plants. They also increase the arbor’s stability and durability. Proper installation of lattice and supports is key to a lasting garden feature.
Attaching Lattice Strips
Start by measuring the sides of your arbor. Cut lattice strips to fit the frame perfectly. Use outdoor-grade screws to attach the lattice securely. Place the strips evenly to create a neat, grid-like pattern. This pattern allows plants to climb easily while adding visual appeal. Check that the lattice is tight and stable before moving on.
Supporting Climbing Plants
Choose strong supports like trellis wires or wooden slats. Attach them vertically or diagonally across the lattice. This guides plants upward and keeps them well-supported. Tie young plants gently to the supports with soft garden ties. Regularly check and adjust ties as plants grow. Good support prevents damage and encourages healthy plant growth.
Finishing Touches
Finishing touches bring your garden arbor to life. They improve its look and protect the wood. Careful attention to these steps ensures your arbor stays beautiful for years.
Sanding And Smoothing
Start by sanding all surfaces of the arbor. Use medium-grit sandpaper to remove rough spots. Then switch to fine-grit for a smooth finish. Sand edges and corners carefully to avoid splinters. Wipe dust off with a damp cloth before moving on.
Applying Stain Or Paint
Choose a stain or paint made for outdoor wood. Stain shows the wood grain and adds color. Paint gives a solid, colorful look and extra protection. Apply evenly with a brush or sprayer. Let the first coat dry fully before adding a second. This helps prevent peeling and cracking.
Maintenance Tips
Check your arbor regularly for signs of wear or damage. Clean it with mild soap and water to remove dirt and mildew. Reapply stain or paint every 2-3 years to keep it sealed. Trim plants that grow on or near the arbor to avoid moisture buildup. Simple upkeep extends your arbor’s life and charm.
Planting Around The Arbor
Planting around your garden arbor brings life and charm to the structure. Plants soften the wood and add color and texture. They can create a welcoming entrance or a quiet retreat. Choosing the right plants and caring for them well ensures your arbor looks beautiful all year.
Choosing Climbing Plants
Select climbing plants that suit your garden’s sunlight and climate. Clematis, climbing roses, and honeysuckle are popular options. Choose plants with flowers or foliage that match your garden style. Avoid fast-growing plants that might damage the wood.
Training Vines
Guide your vines gently along the arbor’s frame. Use soft ties or garden twine to attach stems. Train vines to grow evenly to cover the structure fully. Regular pruning helps keep growth tidy and healthy.
Seasonal Care
Water your plants regularly during dry spells. Mulch around the base to keep moisture and reduce weeds. In winter, protect delicate vines from frost with burlap or garden fabric. Remove dead or damaged growth in early spring to encourage new shoots.
Credit: www.homedepot.com
Frequently Asked Questions
How Do I Build My Own Arbor?
Dig post holes and set sturdy posts in concrete. Attach top beams and crossbeams securely. Add lattice for climbing plants. Sand, stain, and seal for weather protection. Customize design as desired for a unique garden arbor. Use pressure-treated wood for durability.
What Is The Best Material For A Garden Arbor?
Cedar is the best material for garden arbors due to its natural resistance to rot and insects. Pressure-treated lumber offers a budget-friendly, durable alternative. Both materials withstand weather well, ensuring long-lasting beauty and strength in your garden structure.
How Tall Should A Garden Arbor Be?
A garden arbor should be 7 to 8 feet tall to allow comfortable passage and plant growth. Adjust height based on garden design and plant types.
What Is The Difference Between A Trellis And An Arbor?
A trellis supports climbing plants and decorates walls or pergolas. An arbor defines garden paths and creates inviting gateways.
Conclusion
Building a garden arbor brings charm and structure to any yard. Follow simple steps to create a sturdy frame. Use weather-resistant wood for long-lasting results. Secure posts firmly in the ground to ensure stability. Add lattice or trellis for climbing plants to grow.
Customize your arbor with curves or decorations you like. Enjoy the beauty and shade it provides in your garden. A handmade arbor creates a warm, inviting outdoor space. Start your project today and watch your garden transform.